
I'm excited to announce that I have seven confirmed projects for my 25 Days of Handmade Christmas series! With a few more possibilities. If you're interested in joining, click here for more details.
Since day one was used to get the series up and running, there will be one day with two tutorials so that I get in the full 25 projects. Until then, here is the project for day two.
Jute Wrapped Christmas Trees
By: Me!
By: Me!
Before I get started, let me preface this post with several facts:
1. I was being extremely lazy while creating this craft. I was sitting in the living room, watching tv, in my sweats, in a big comfy chair. The lighting is bad, and my workspace isn't pretty.
2. My fingernails look like death. Sorry, I'm not too girly. I'm just attempting to overcome my 24 year habit of biting my nails. Fingernail polish and the chipping of said polish is helping this process...
3. While editing my photos (which I just learned photobucket allows you to do!), the uploading wasn't working properly. I attempted to upload edited photos and the originals would upload instead. Sometimes when I view the page they look fine and other times they look awful. Not sure what's going on, but I apologize if you encounter some funky photos.
Ok, now that I've got all of that out of the way, here's my tutorial!
Materials:
Styrafoam cone forms. You can use as many or as few as you'd like and whatever sizes you prefer. I used three of varying sizes.
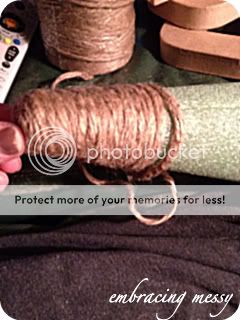
Jute (or yarn). The roll I purchased was 125 ft which left me with some extra.
Glue gun
Felt
Scissors
Accessories (poinsetta flowers, ribbon, small ornaments, anything your heart desires!)
Step 1: Since my cone forms had a flat top, I began by rolling the jute to look like this and then placing a dab of glue on the top of the cone to secure it.

Step 2: Continue to wrap the jute (or yarn) around the form, placing a dab of glue here and there to secure it. As I got to the last couple of rows, I used a lot more glue to make sure that it was extra secure.


Step 3: Cut out a round piece of felt and secure to the bottom of the tree. This keeps the ugly green pieces from flaking off of the styrafoam and getting everywhere.
Step 4: Decorate! I used poinsetta flowers on mine which easily stuck into the styrafoam.

This is perfect for the huge roll of leftover sisal I have from making garland for our tree!
ReplyDeleteFound you on Freestyle Friday!
Sarah - thepurplehound.blogspot.com
They turned out great!!
ReplyDeleteThese are just so very lovely!!! thanks for linking up to the SPEND LESS-GIVE MORE gift party! Blessings!!! :) - Lauren -
ReplyDelete